Experimenting with Encaustic Art
Hi there! How are you? We have been pretty good over here. Enjoying the beautiful Spring blossoms everywhere and the more frequent sun breaks too! Maybe it's the Spring energy or the fact that I've started the second part to the Brené Brown online class but I'm feeling inspired! I have been wanting to try encaustic art forever but I've always been a bit intimidated by all that comes with it.
Well...this week I finally dove right in! I ordered my encaustic medium, a heated palette (mini griddle), hake brushes, encaustic boards and a heat gun. While waiting for it all, I devoured this book and watched every youtube video on encaustic that I could find. Yesterday, it all arrived on my doorstep and I was like a kid at Christmas! All smiles, clapping my hands and doing a little jig. I was that excited. Dorky but true. My mind was a flurry with all the dreamy creations I was going to make using this magical medium!
That evening, after the girls were down and the kitchen looked decent, I set up my encaustic paint "studio" (in my dining room). I opened windows, plugged in the griddle, melted the wax, warmed the brushes and the board and proceeded to lay down my first coat of wax. This is kinda how it went---->
Eeek! It's all uneven.
The brush must be too cool.
Wait or is it the board?
Did I get the right brushes?
<insert swear word here>
Okay calm down.
Try another coat. Don't forget to fuse first!
How long do I fuse for again? <swear word>
Second coat went down. Sigh...more unevenness...brush strokes, pitting.
<more swearing>
Okay, so maybe this isn't as easy as it looks!
I stopped and took a minute to reassess. What am I doing wrong?
Then it dawned on me...how ridiculous to think that I would get it right on the first go! I told myself to relax and just play. I would learn by my mistakes and I had to trust that with practice, I would figure it out.
With that attitude adjustment, the rest of the evening was a blast! Here is my first attempt.
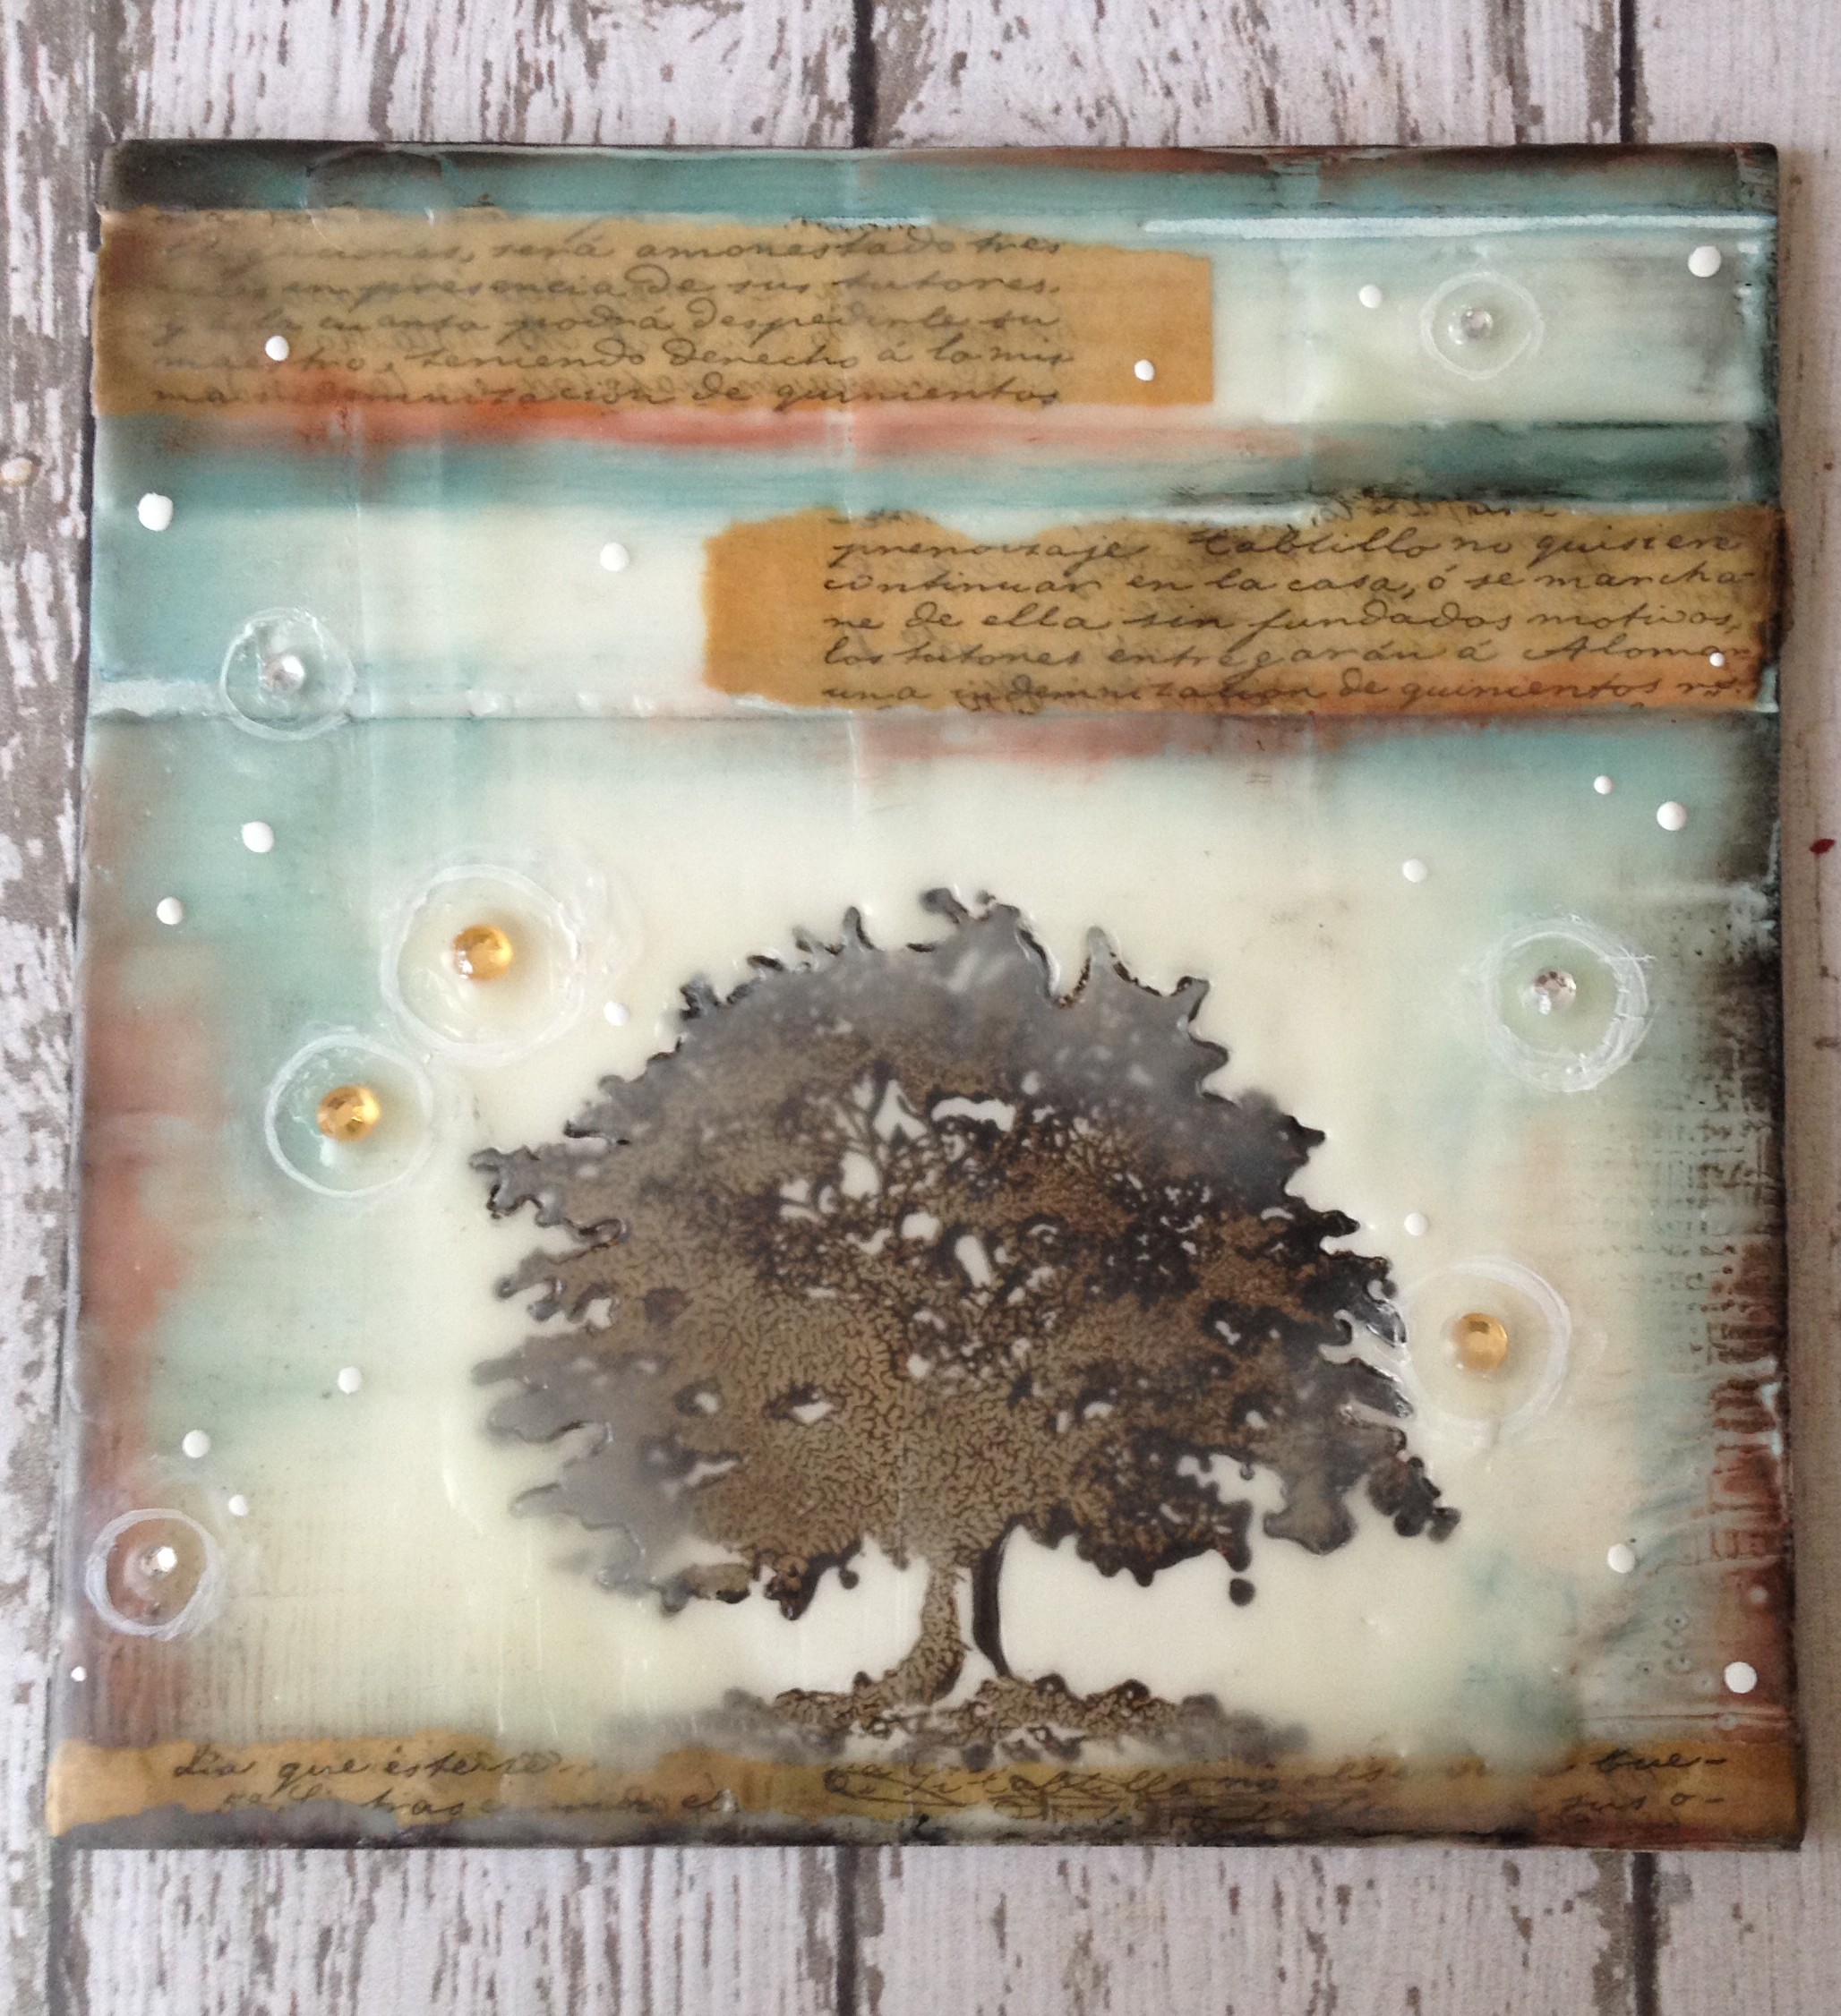
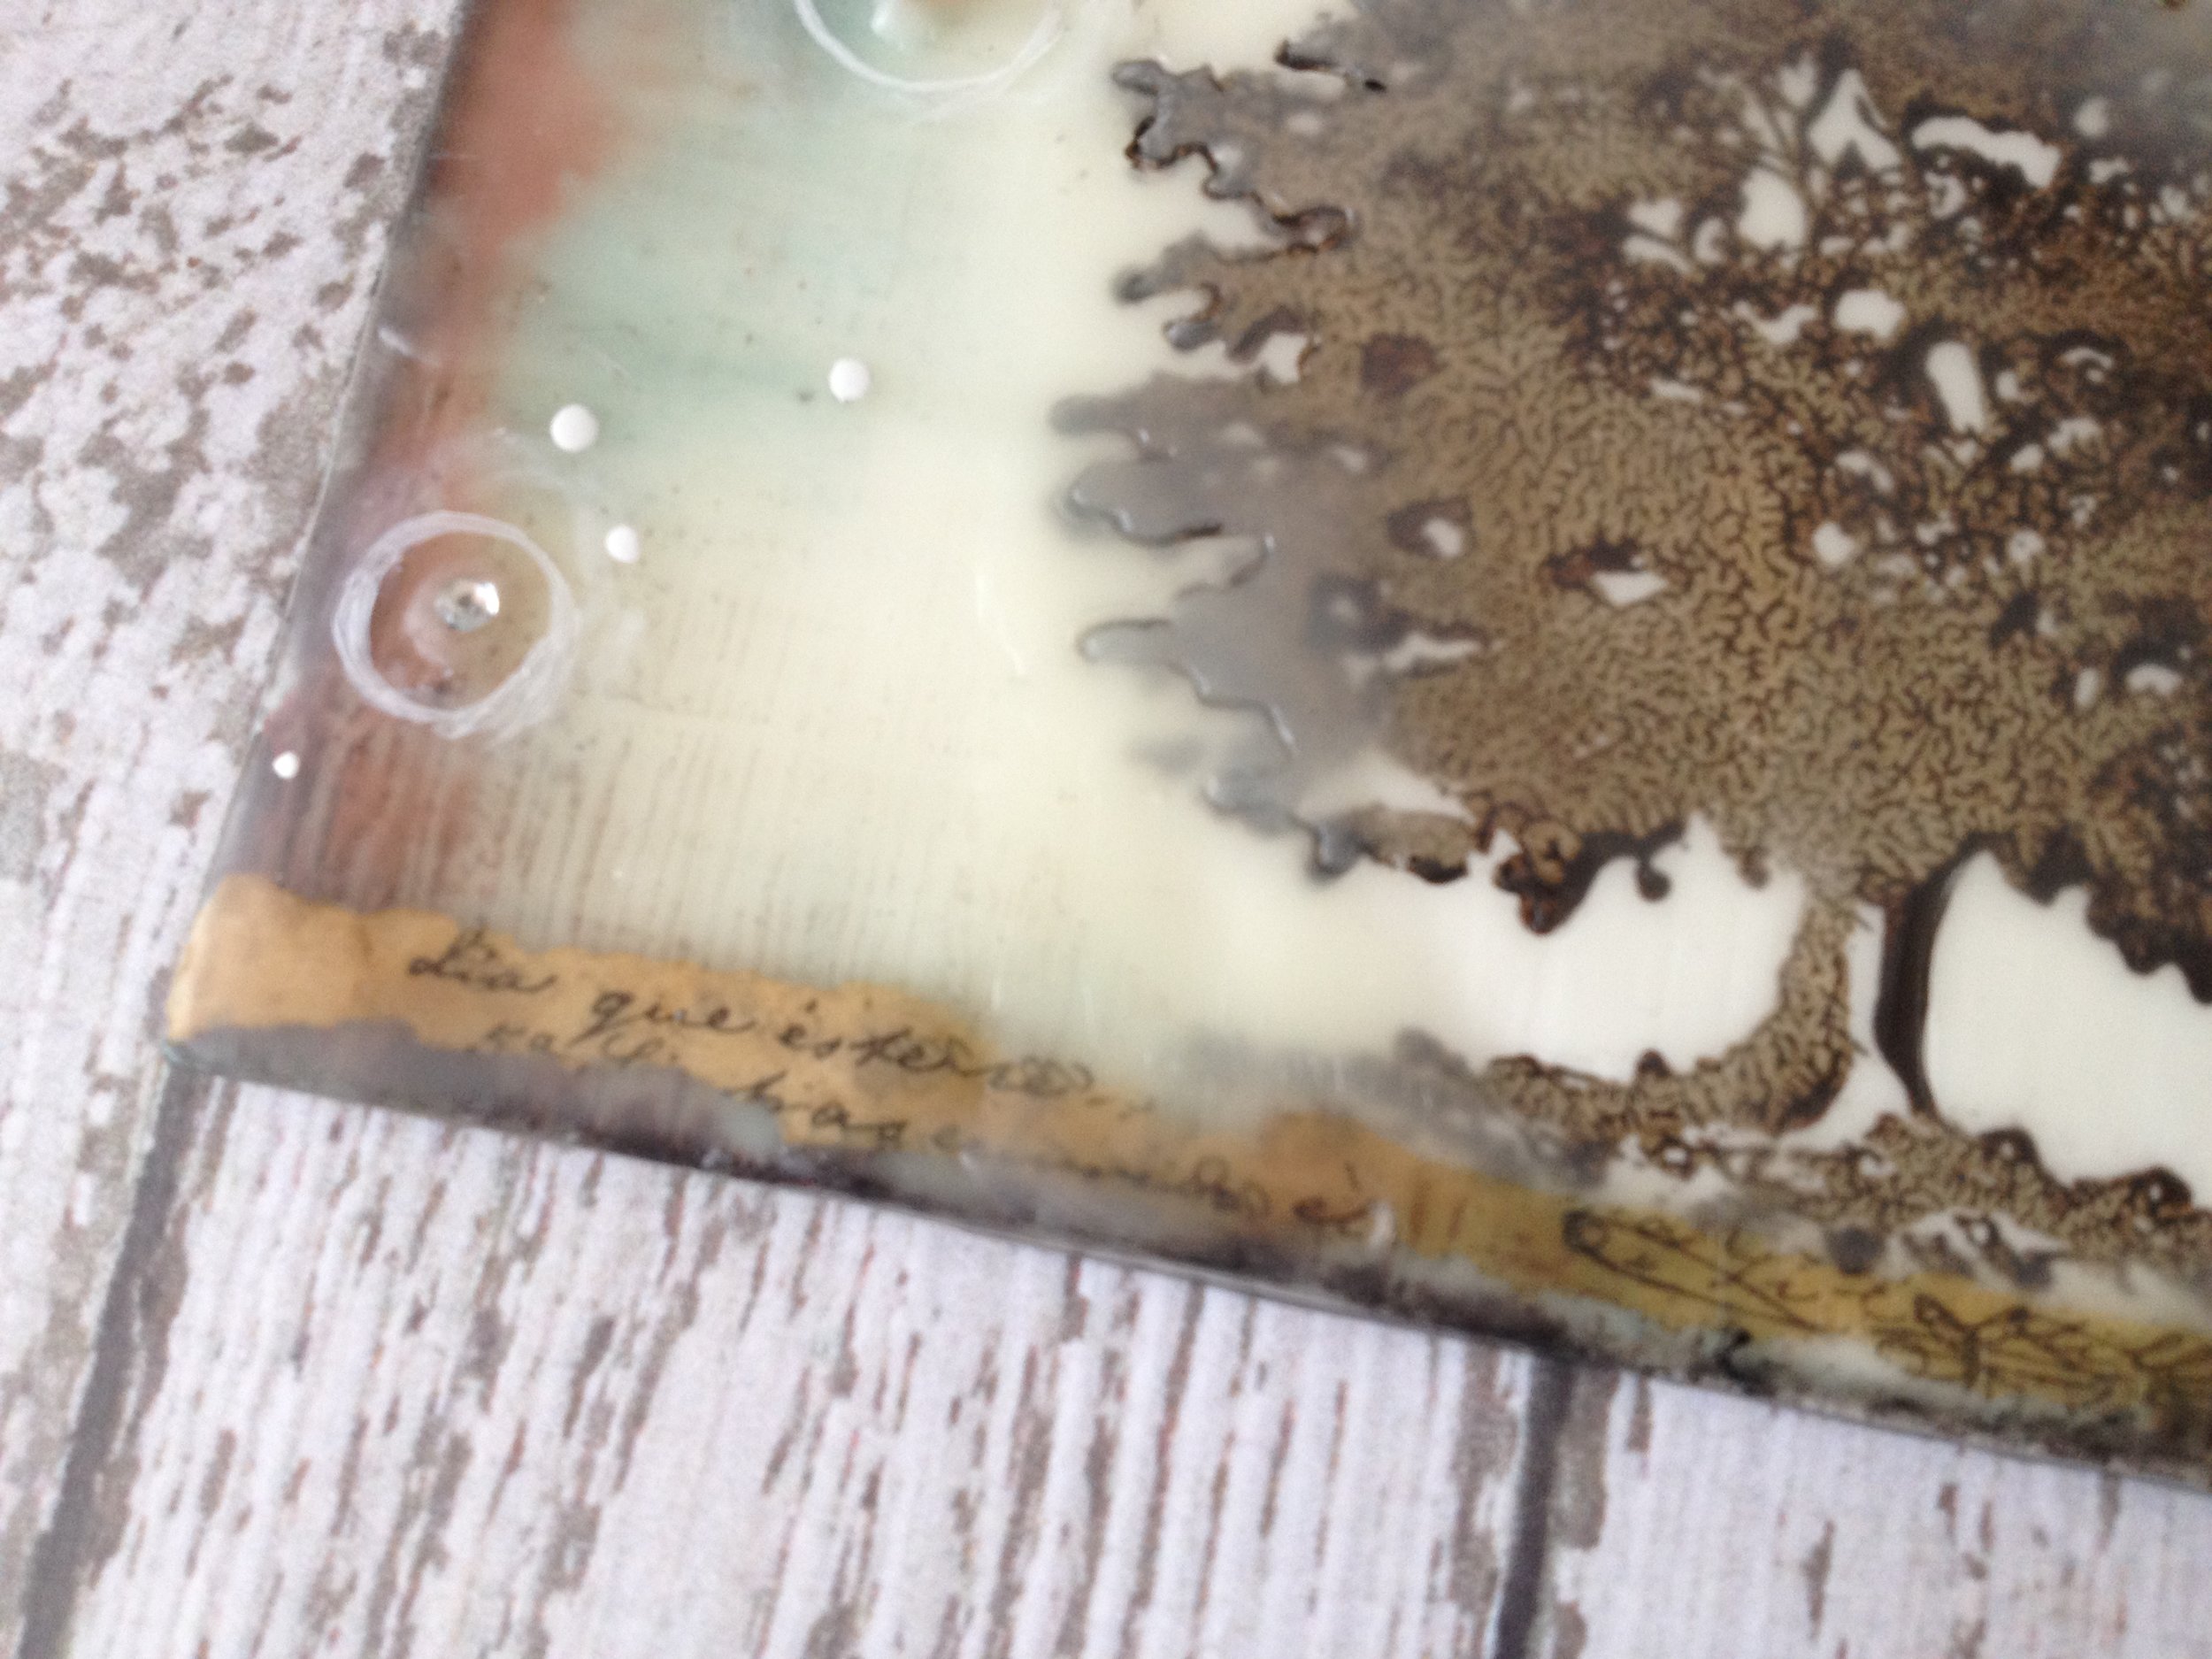
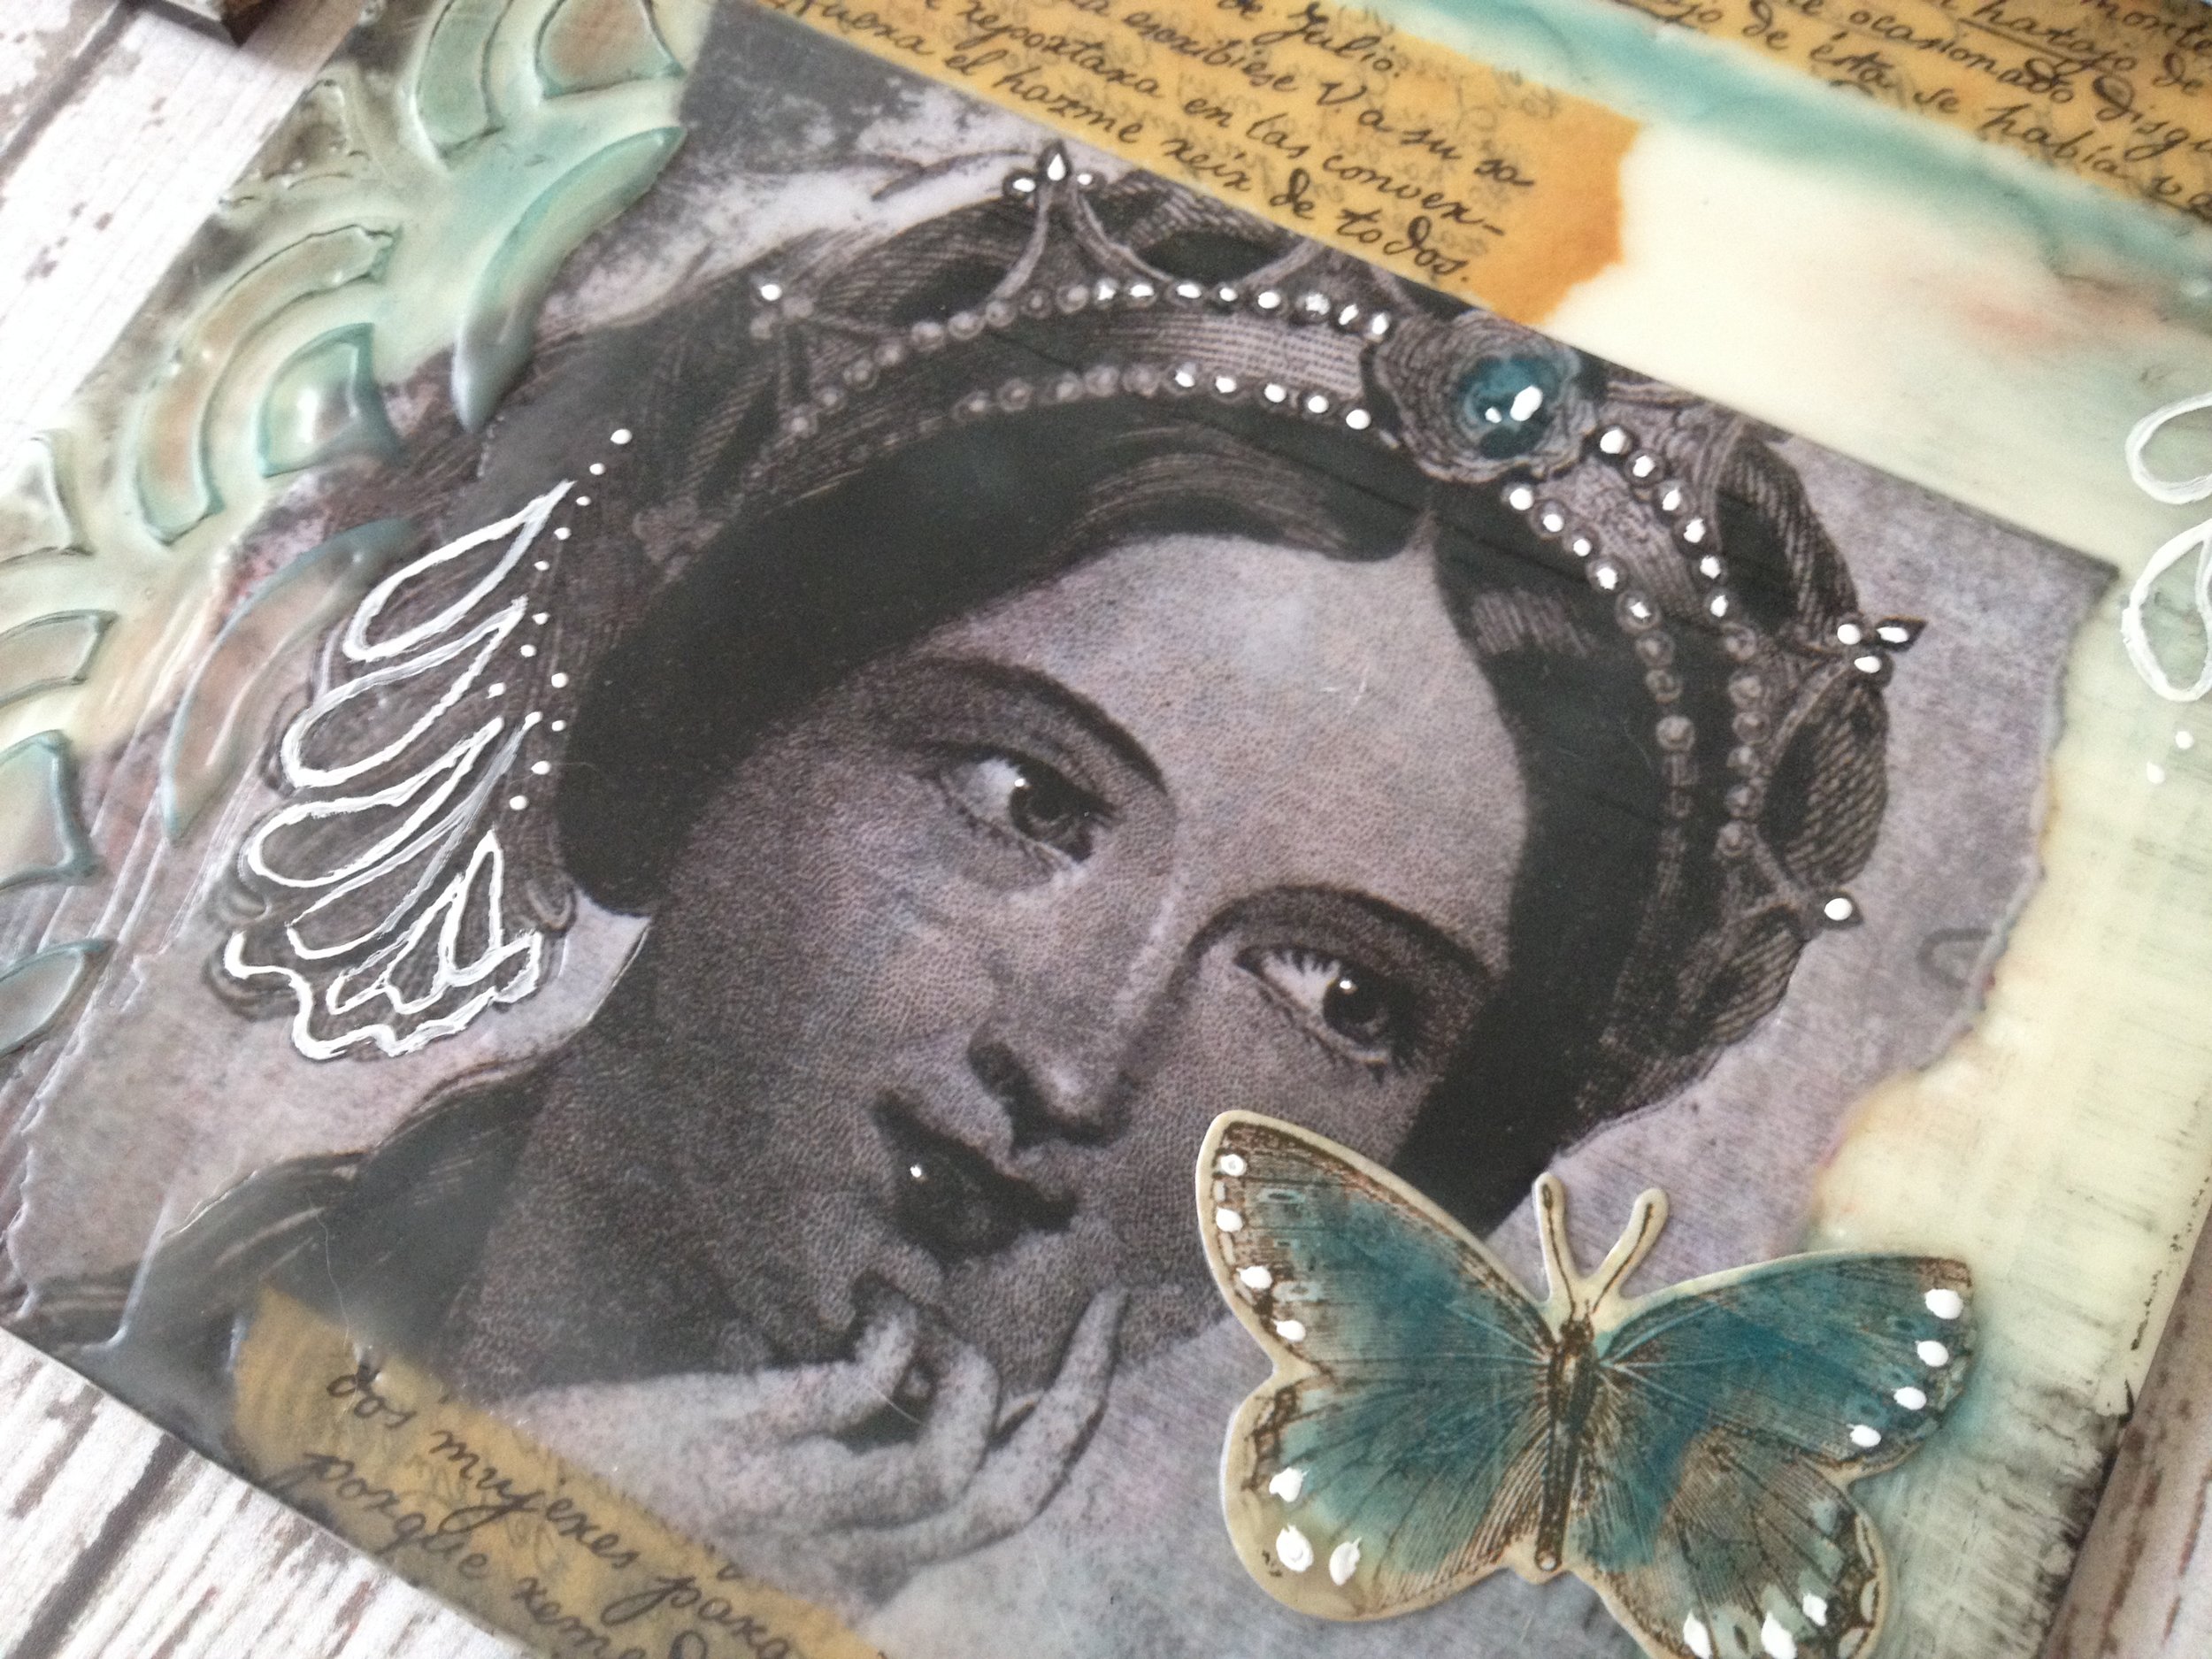
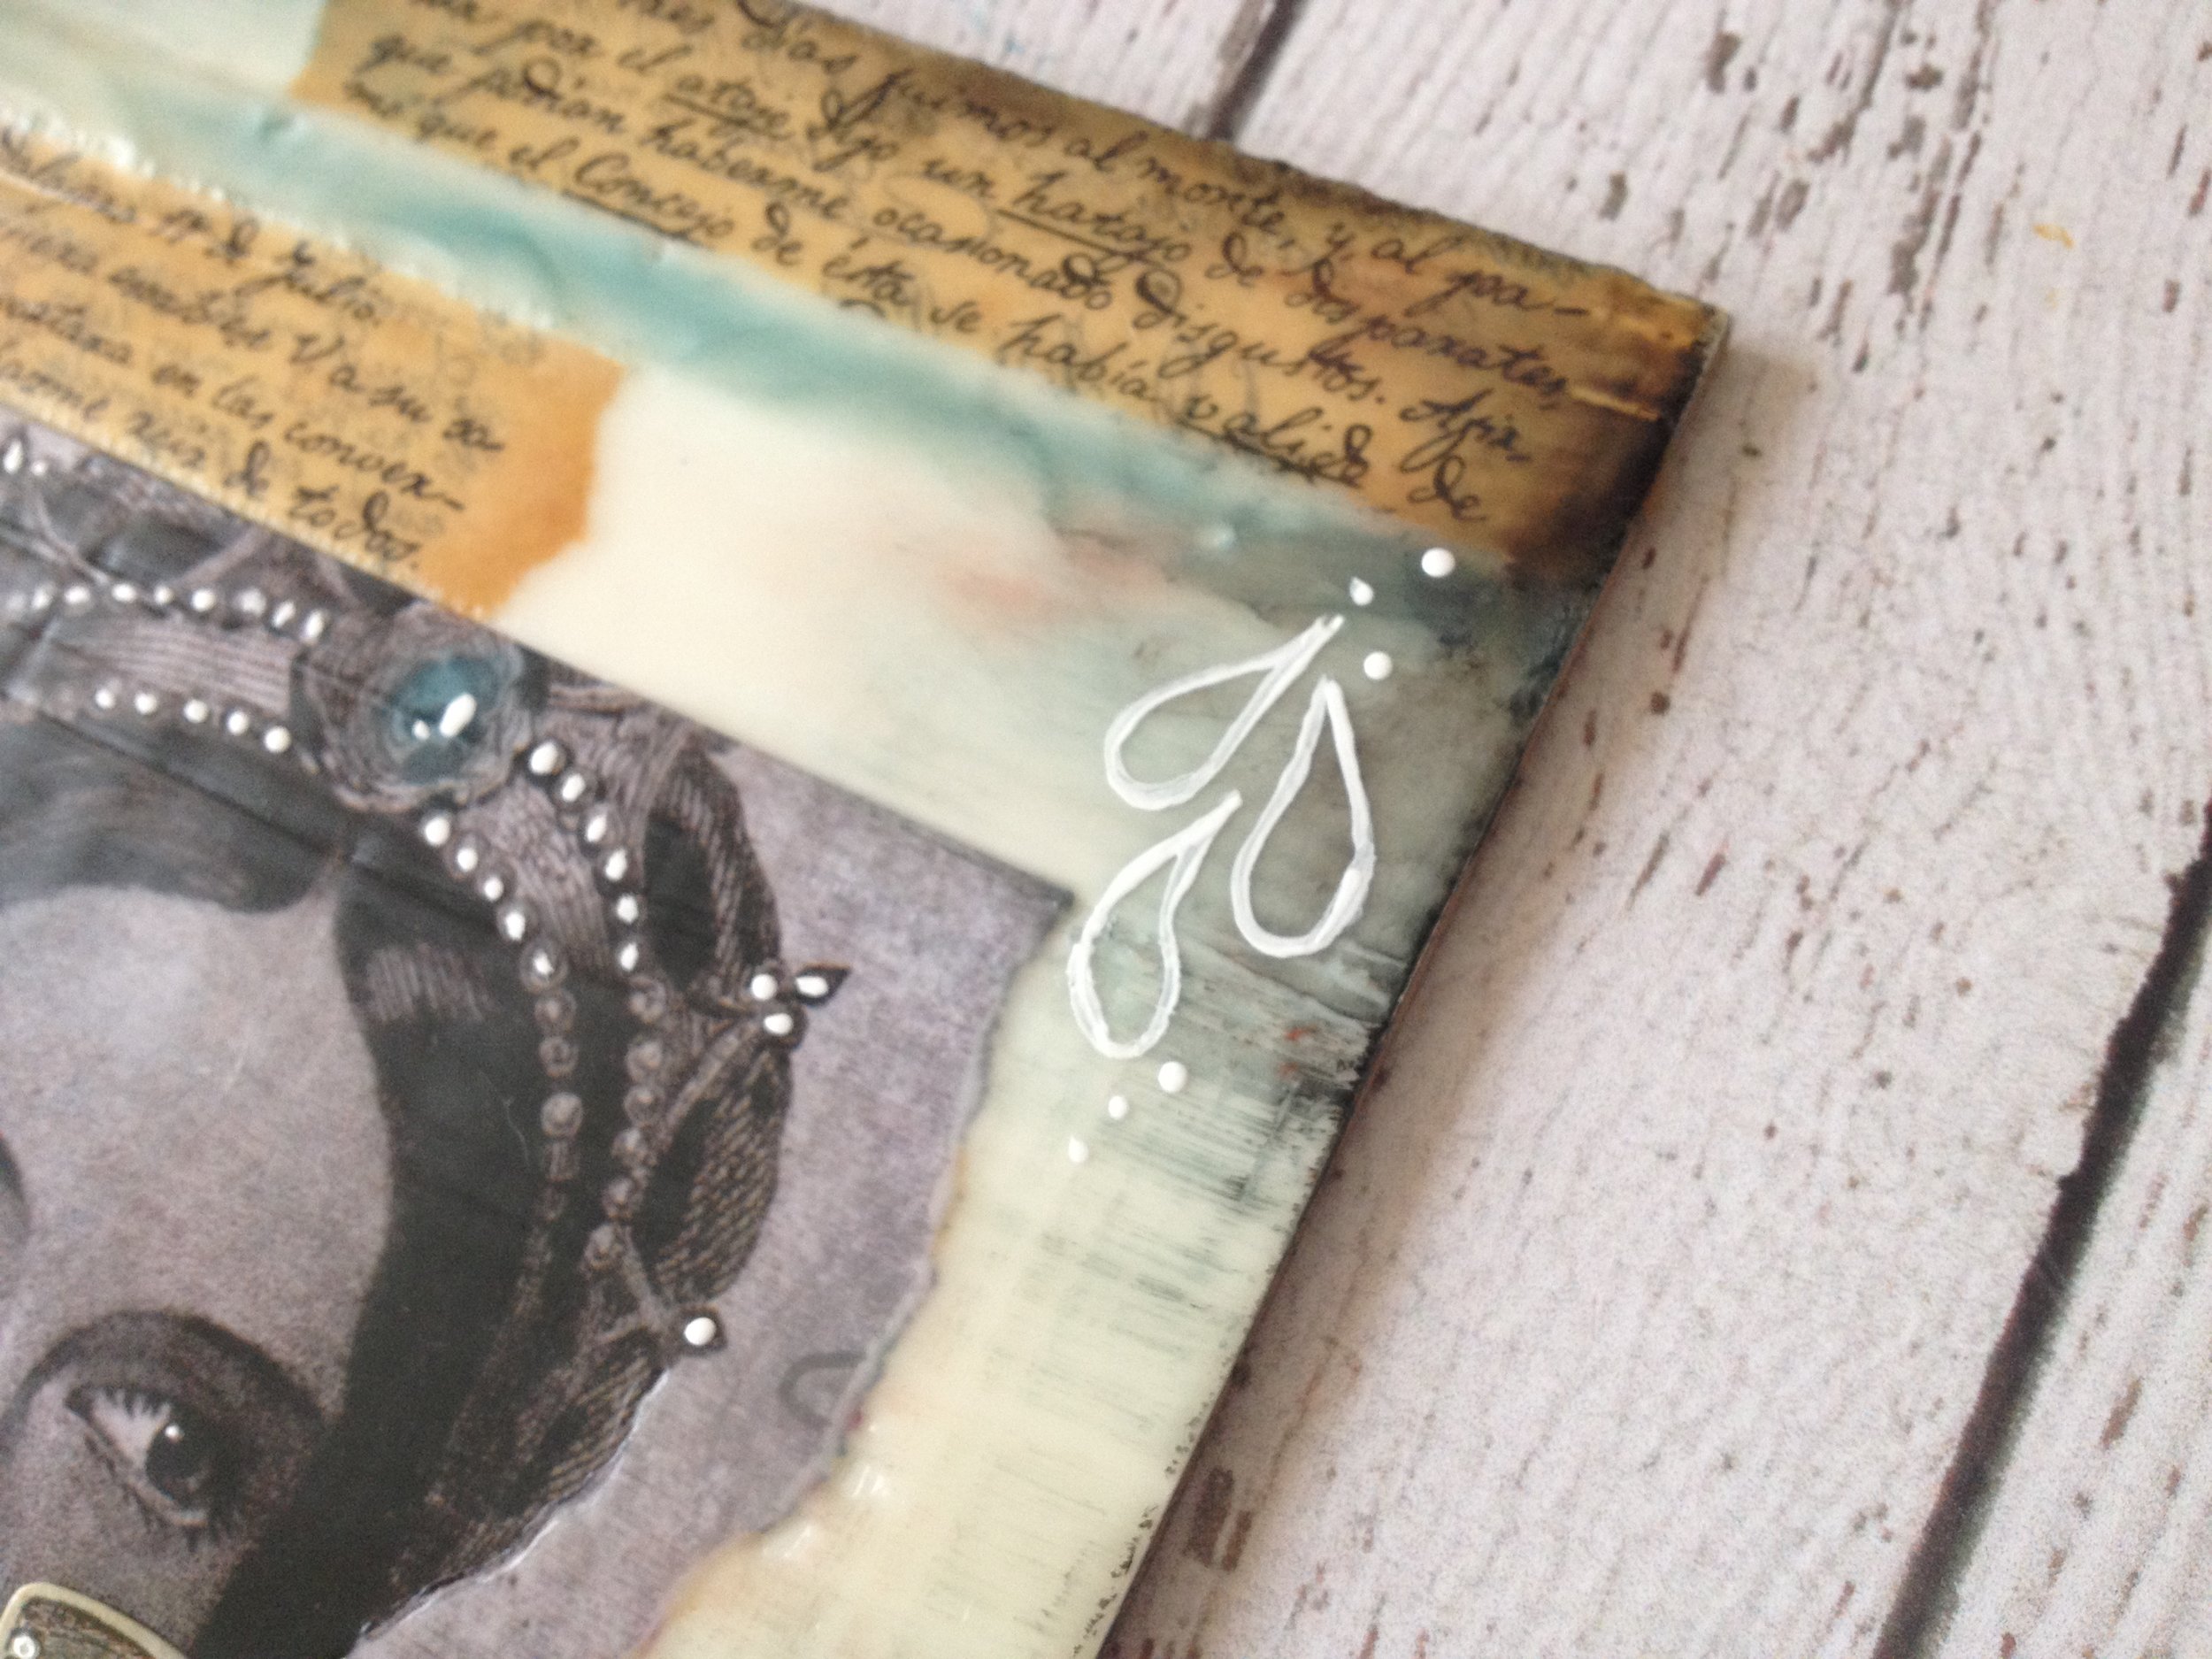
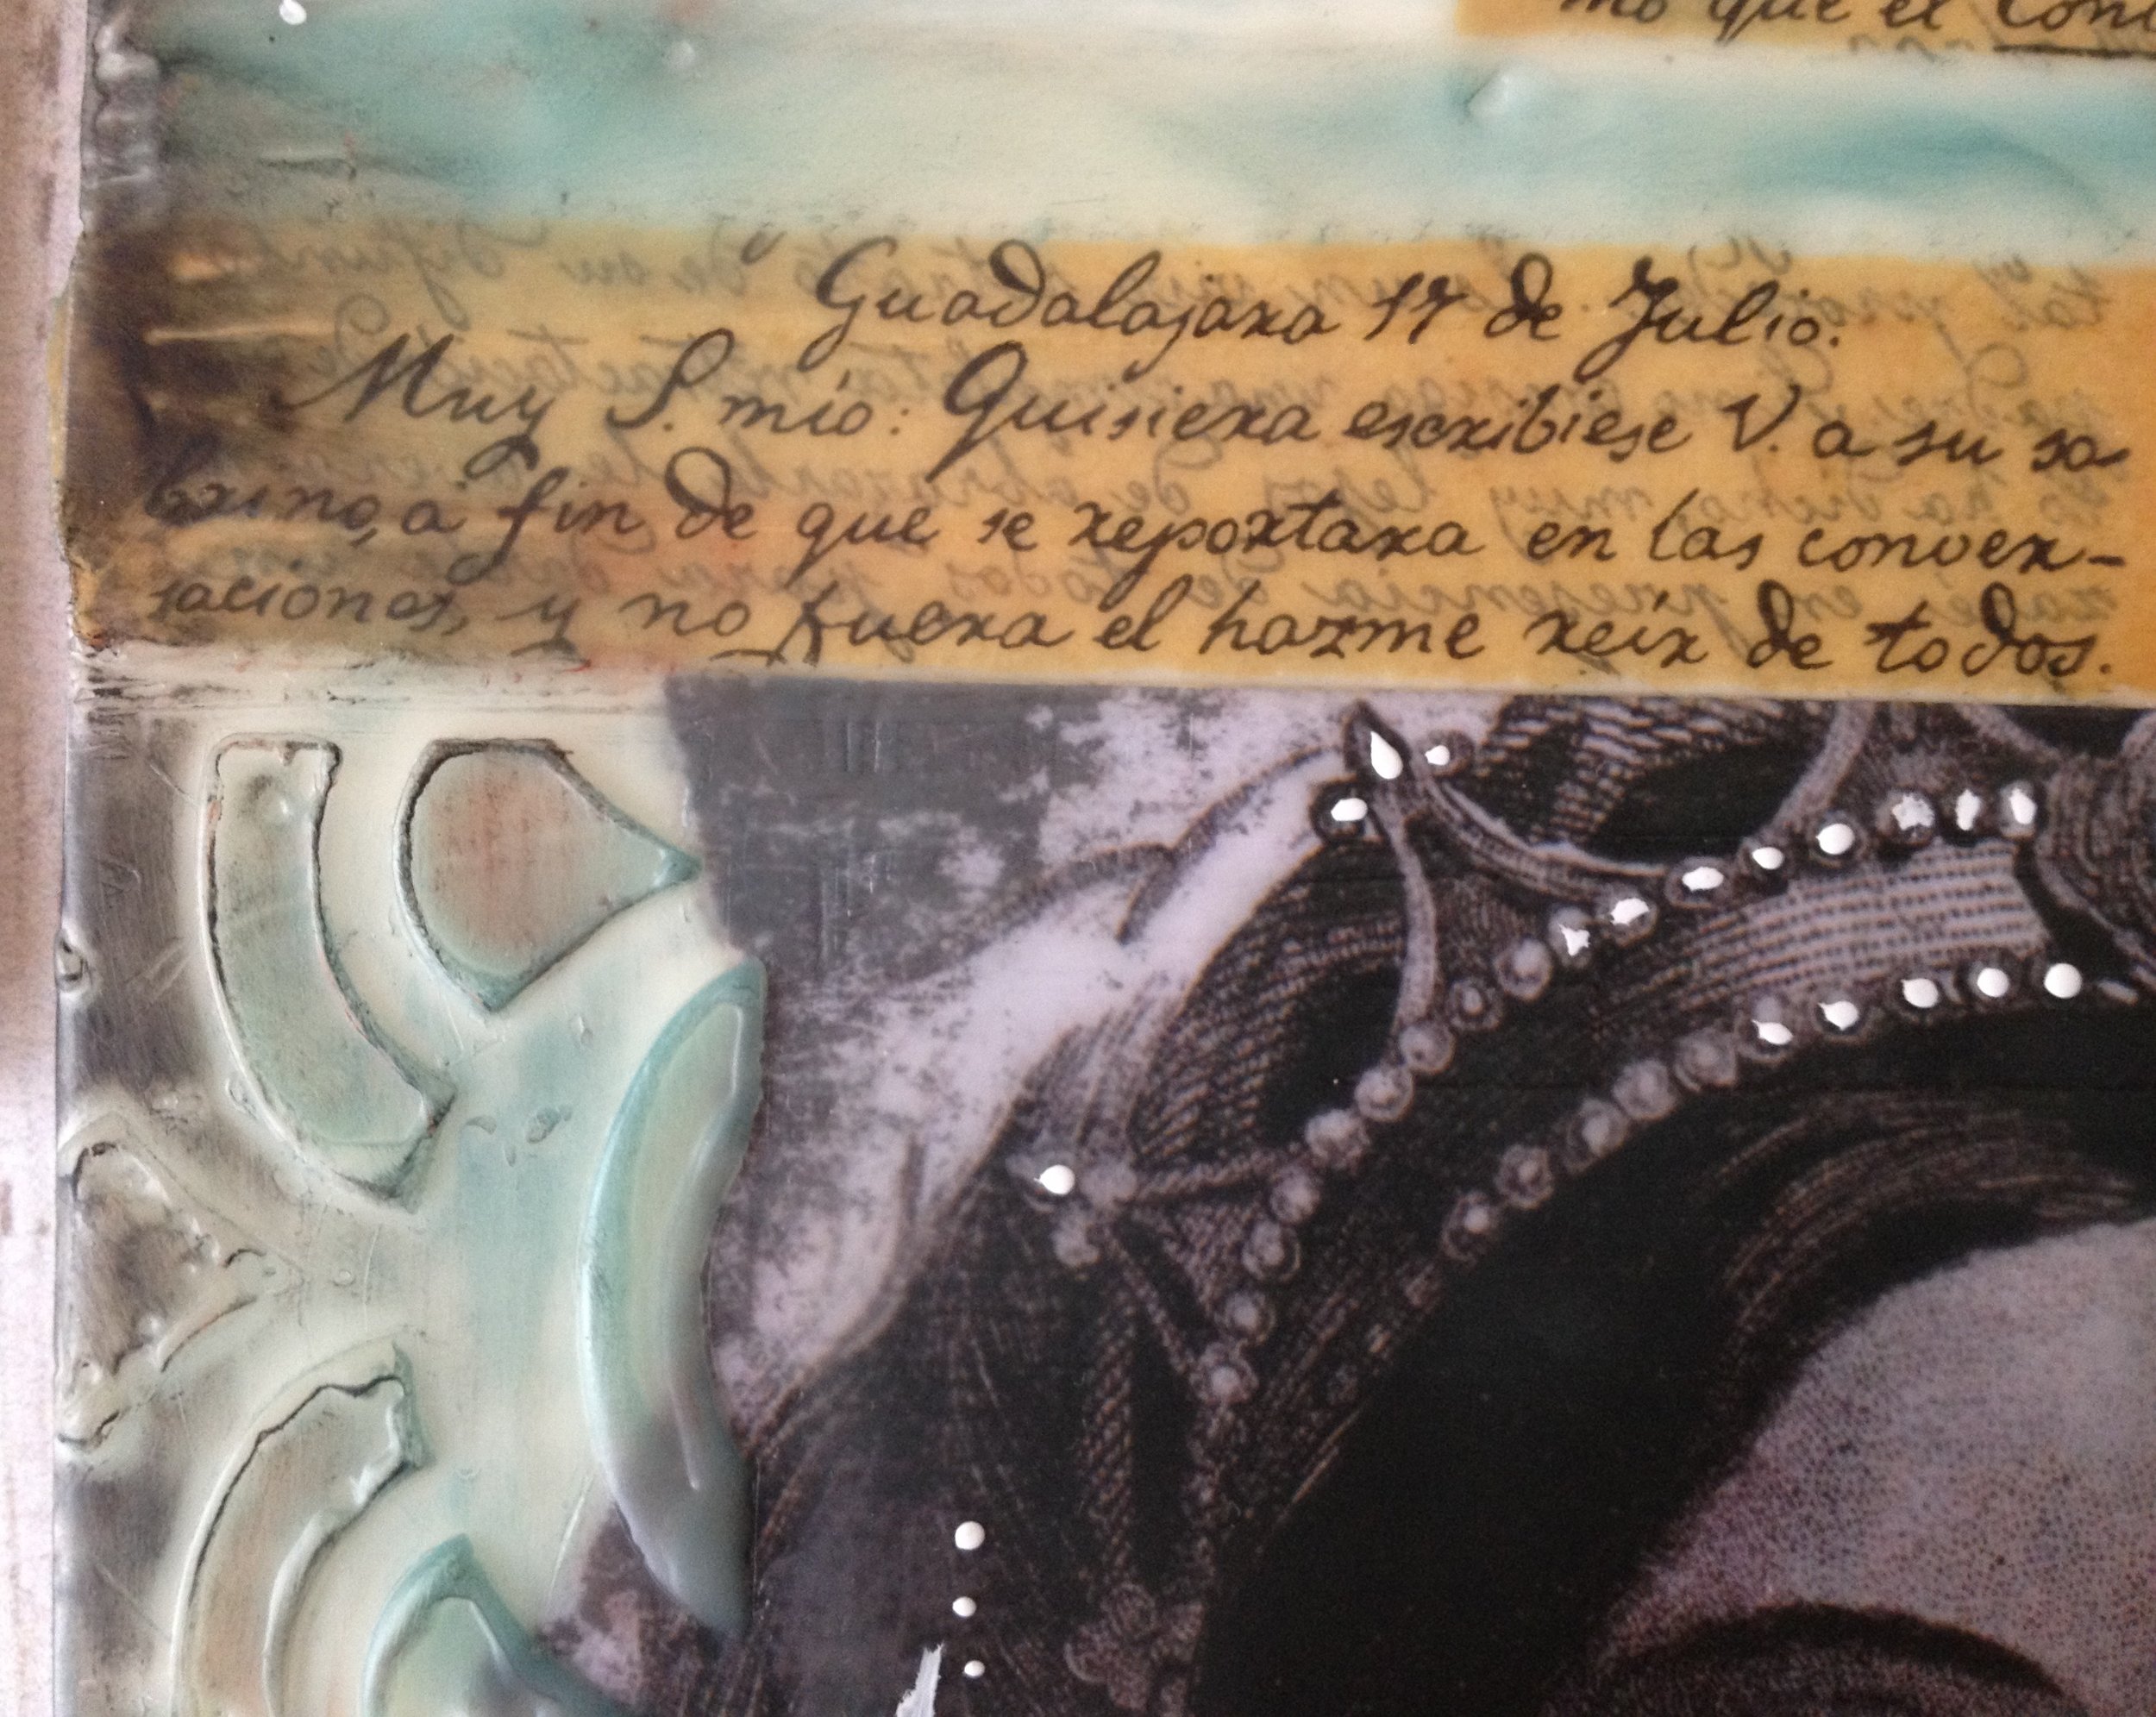
The tree was stamped onto the board with acrylic paint. After that was dry, I put my first layer of wax down. The color was added by way of PanPastels and Gelatos that I smeared together into the wax. The pieces of antique paper were simply collaged onto the piece and coated in wax. Lastly, I added the jewels and painted some details with white acrylic. Here are some close ups of the textures created by the layers of encaustic. 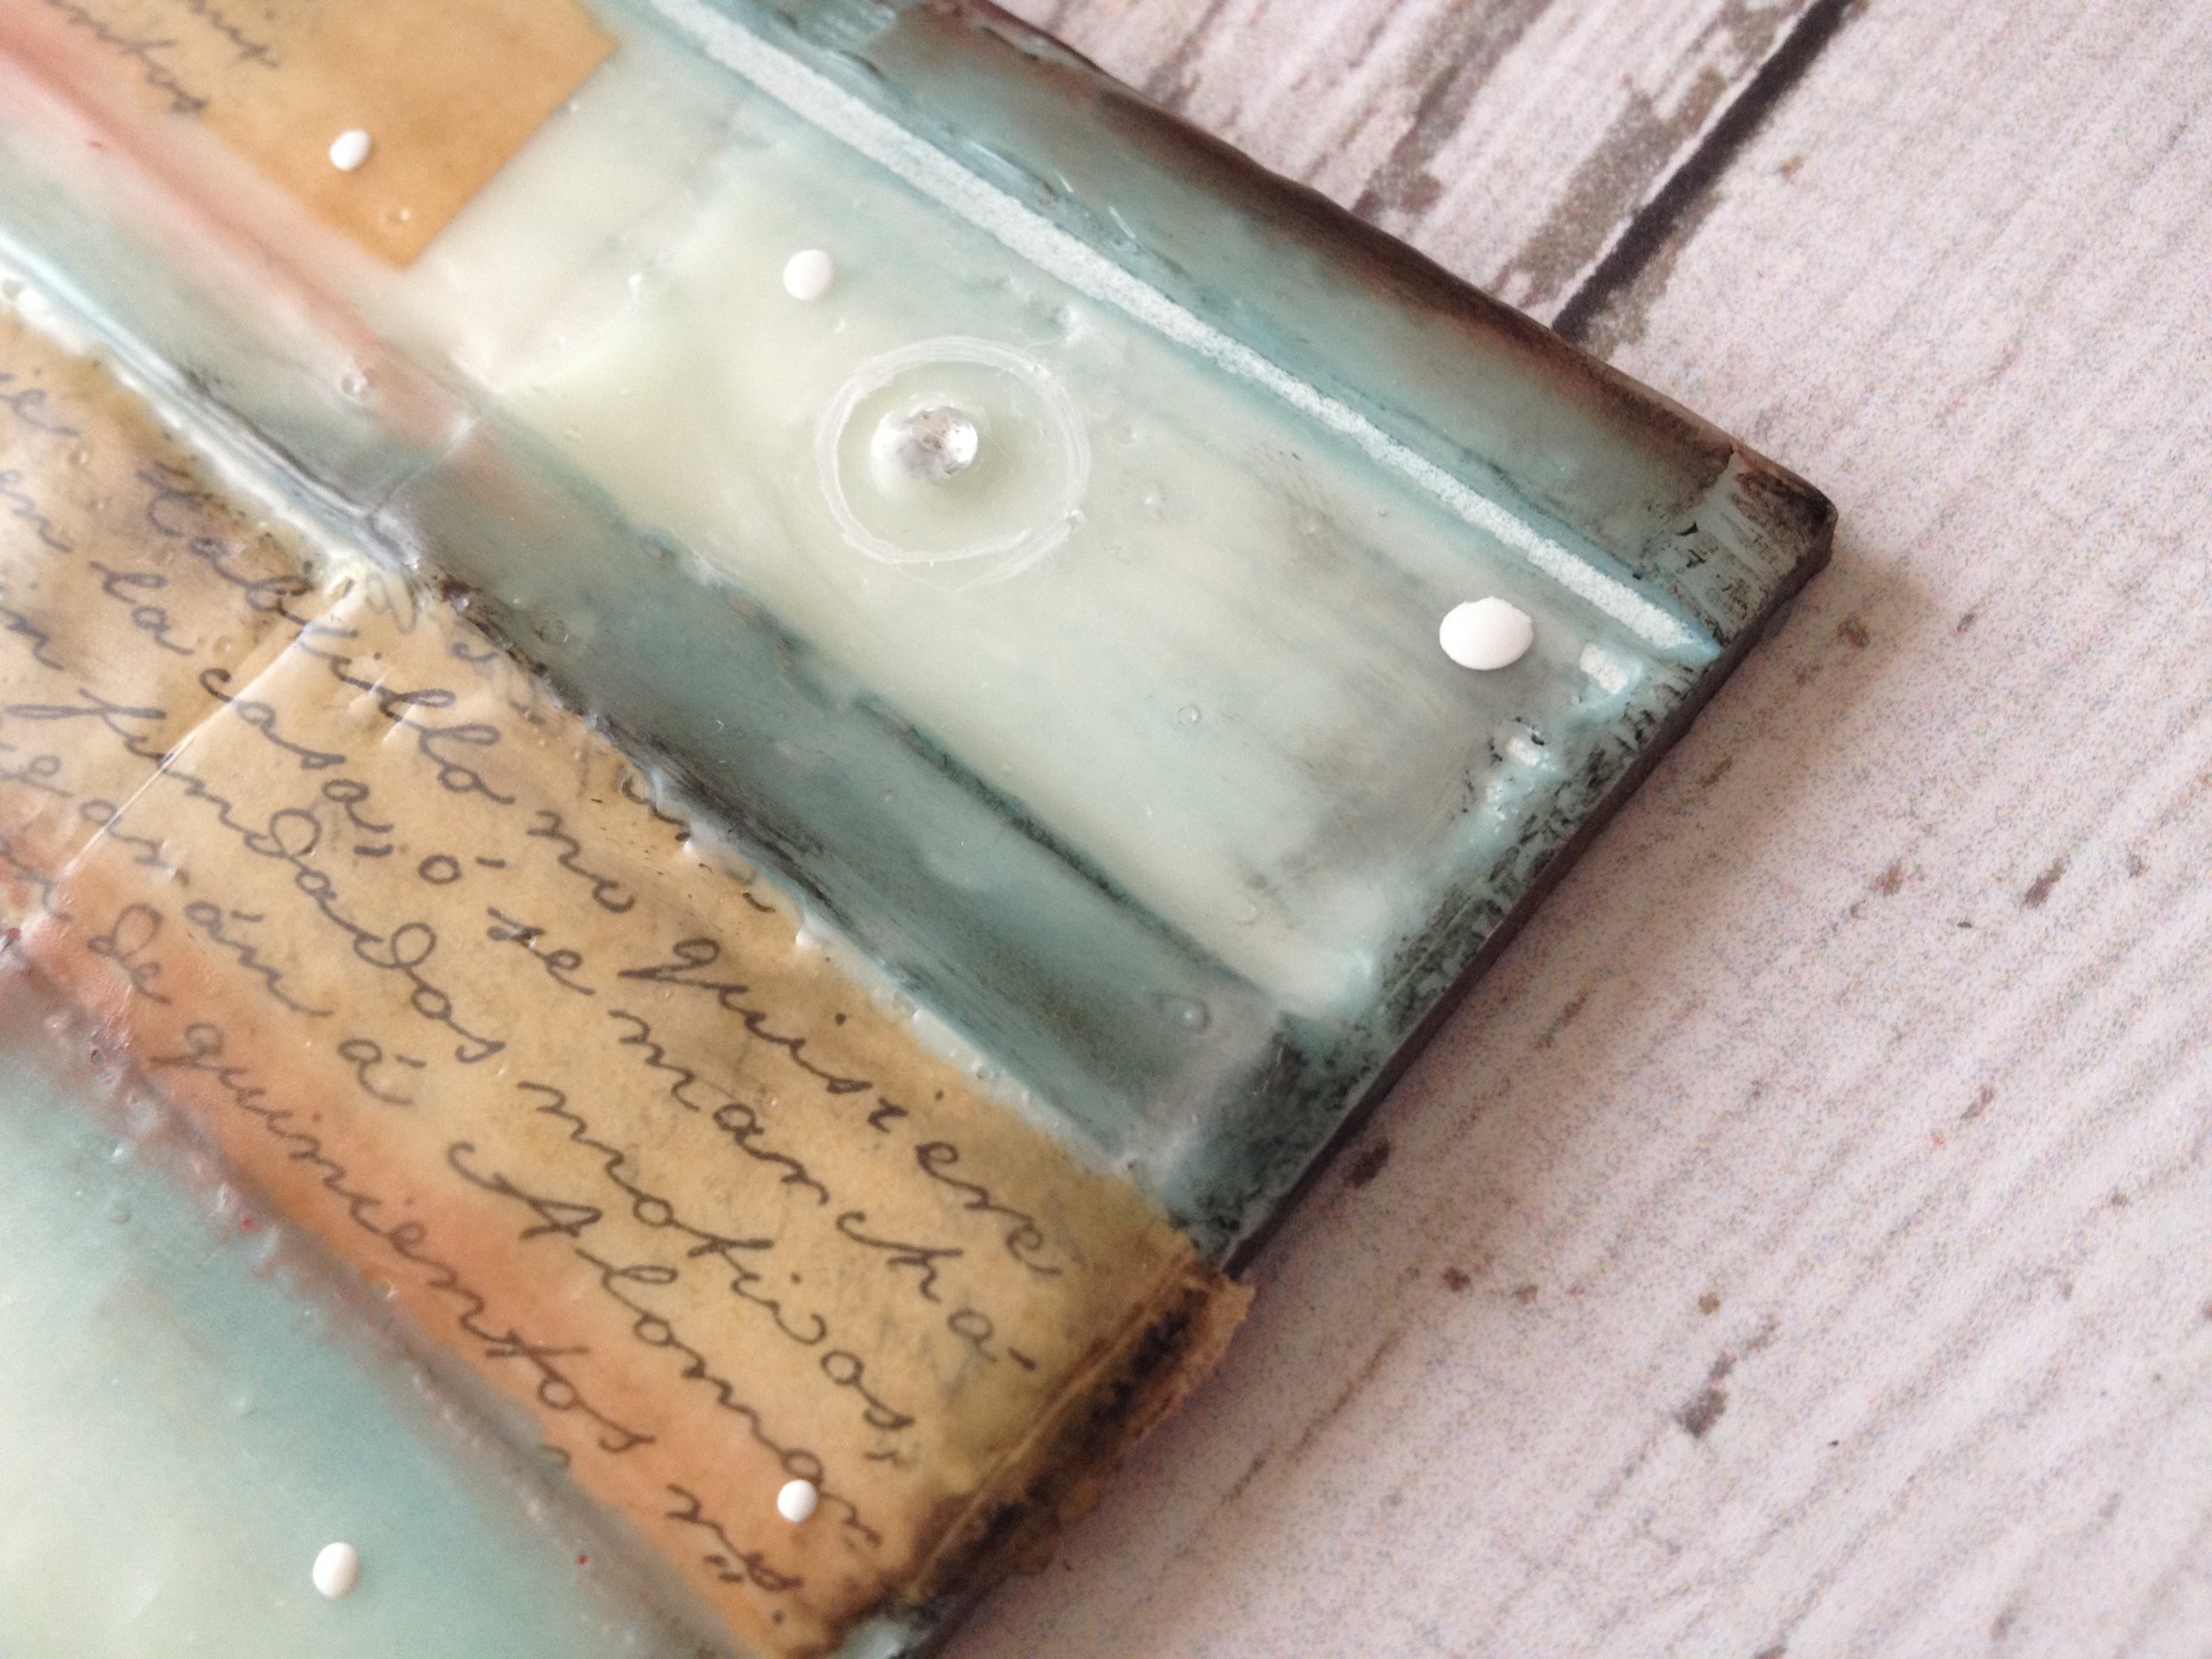
You can see in this one where I used a stylus tool to actually carved the wax to bring out the details in the tree.
It was late so I headed to bed...
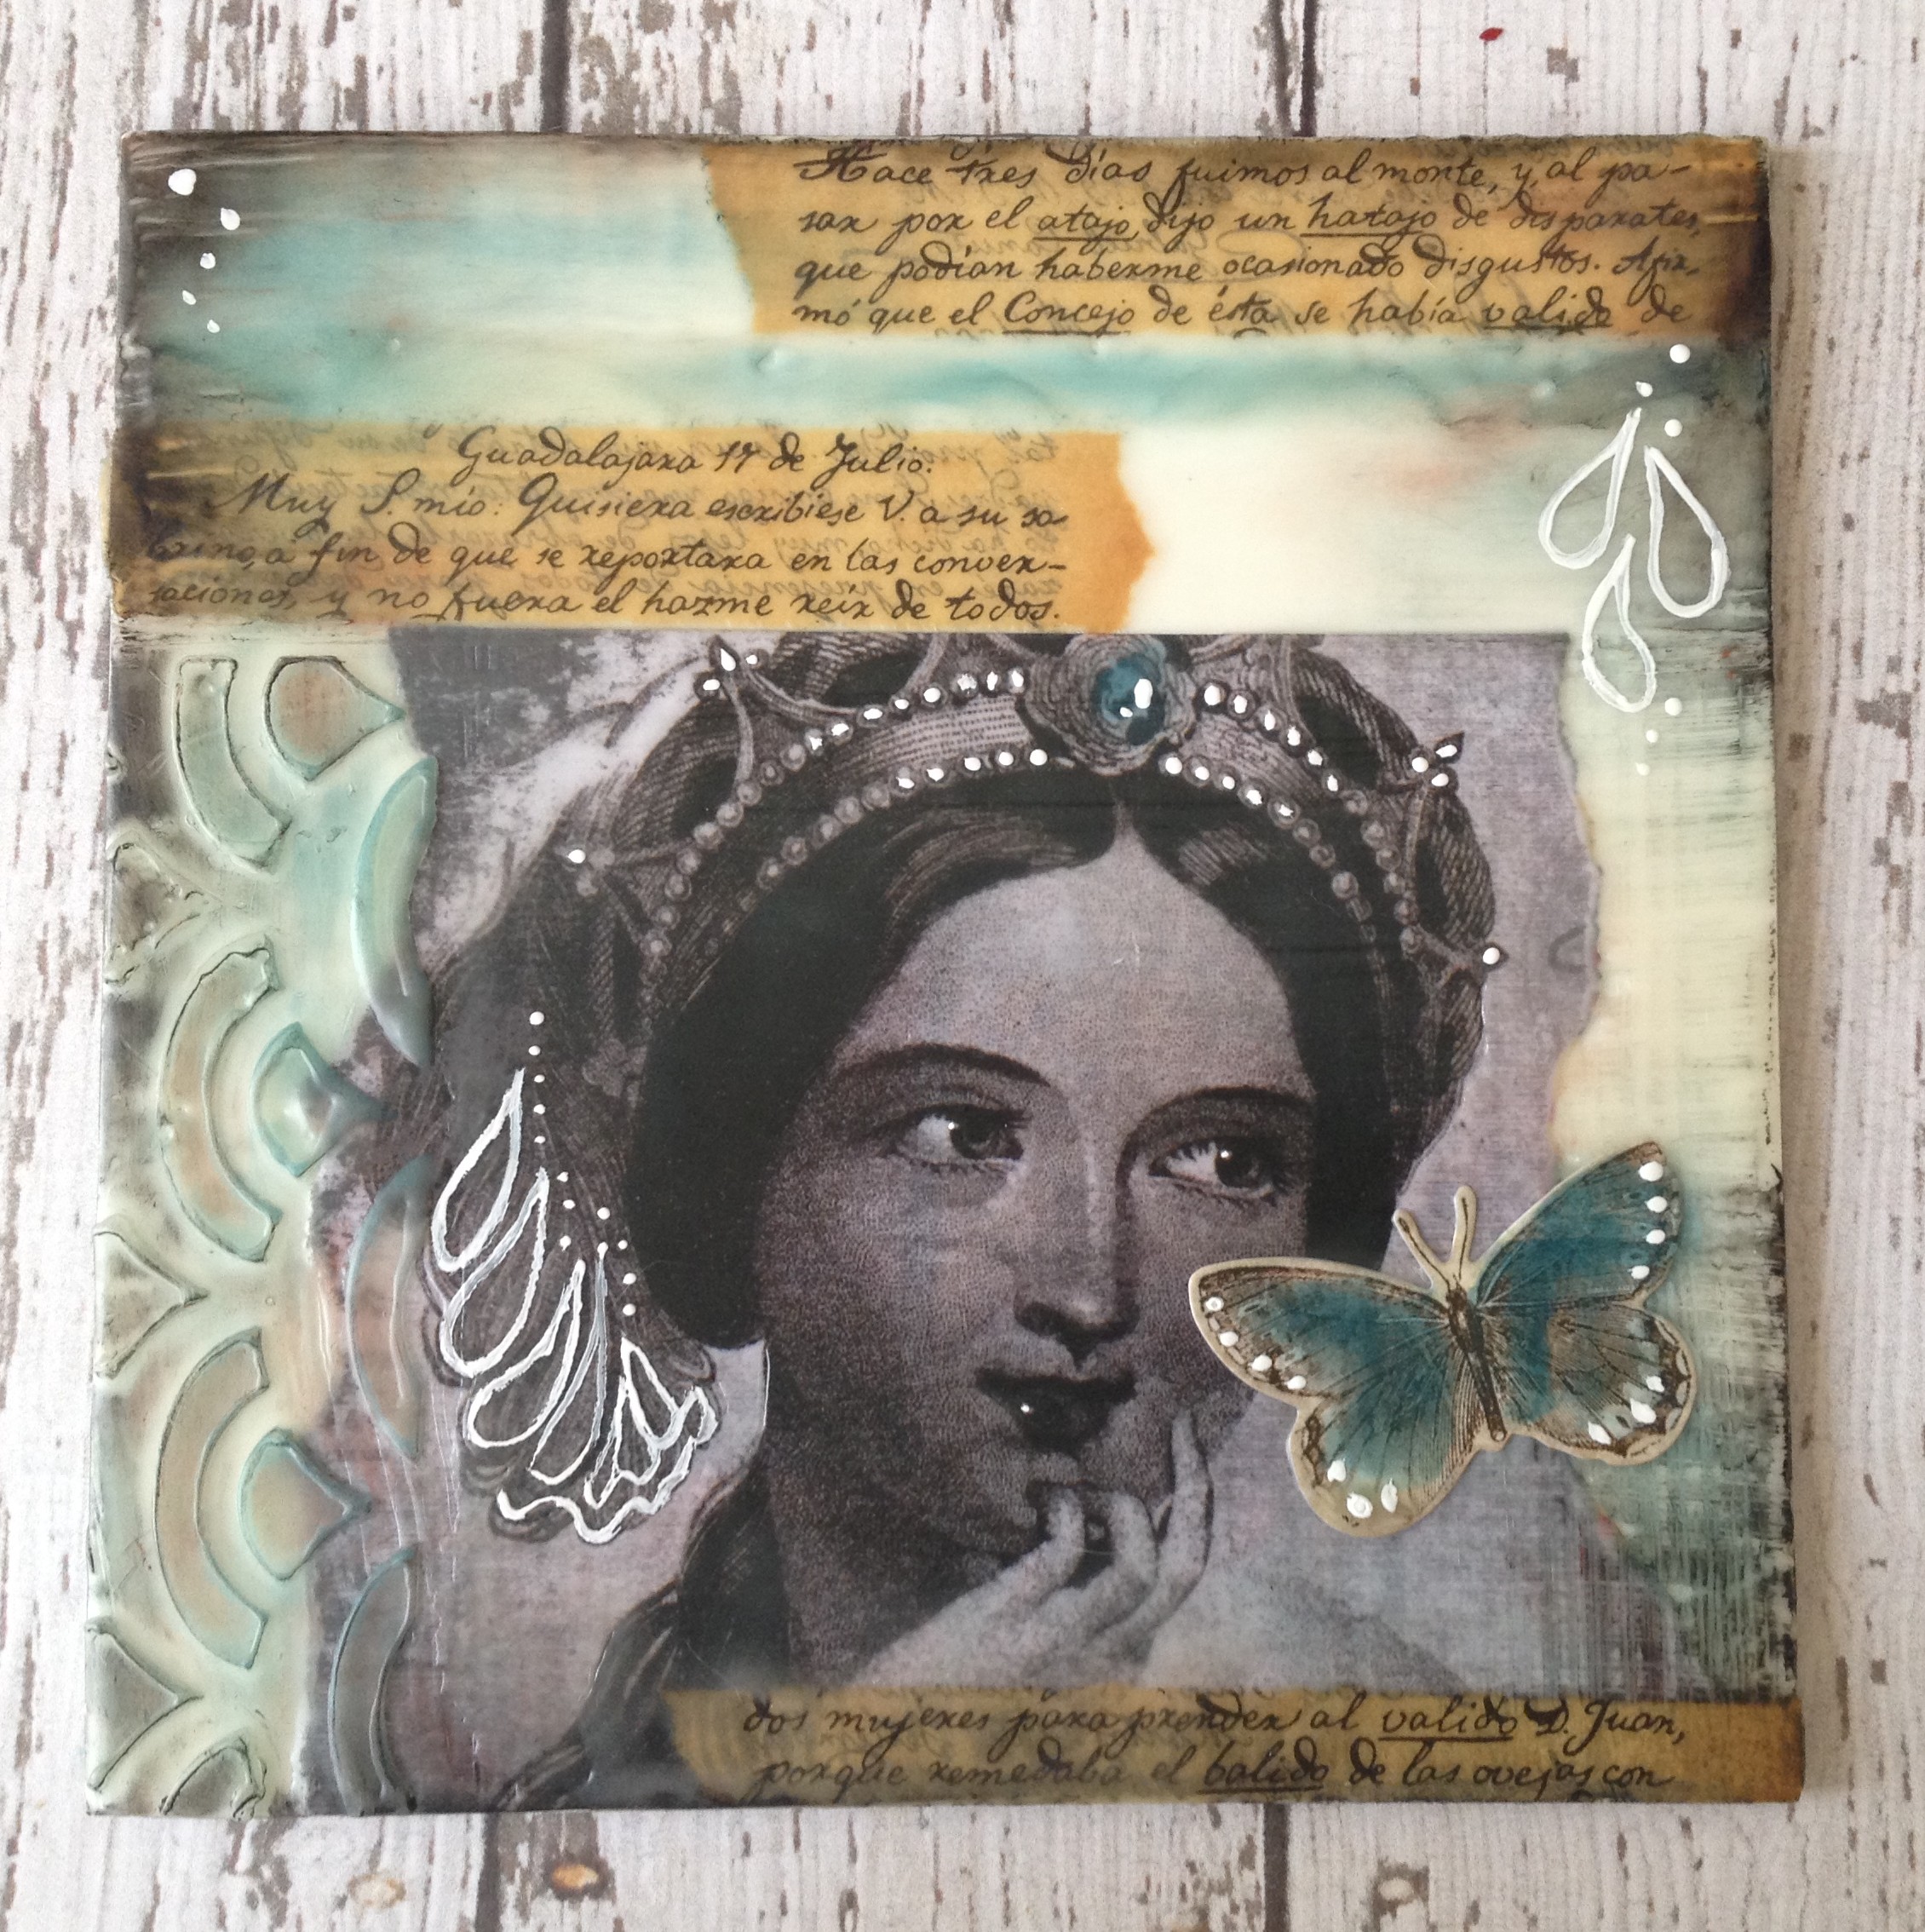
Today, I couldn't wait to get back to it, so as soon as Claire was down for nap I got creating! Here is my second go at it. I kept the color palette and composition similar so I could focus on technique. The process got a tad easier and I got a little braver. On this piece, I used a stencil to create a raised wax pattern. I also moved my "studio" into the kitchen and worked right on top of our glass cooktop and countertops. Put wax paper down first! They are not kidding about those fumes from the wax, so I put my little griddle right next to the exhaust downdraft fan on my stove and it sucked all the icky fumes right down! I also opened up the kitchen window very wide. Last night, I learned the hard way and went to bed with a headache. So today I wasn't going to risk breathing that stuff in.
I also learned that if you add PanPastel, oil pastel or Gelatos to your wax layer and you don't like them - Yikes! - you can clean it all off using Linseed Oil and a paper towel! Yah!!

I absolutely love working this way and I'm looking forward to experimenting more with encaustics. I think I'll do something more abstract next time? Hmmm...
Anyway, let me know if you have any questions. I'm FAR from an expert, obviously, but I'm here to help if I can! :)
Have a beautiful weekend and go try something new!
Much love,
Ivy