
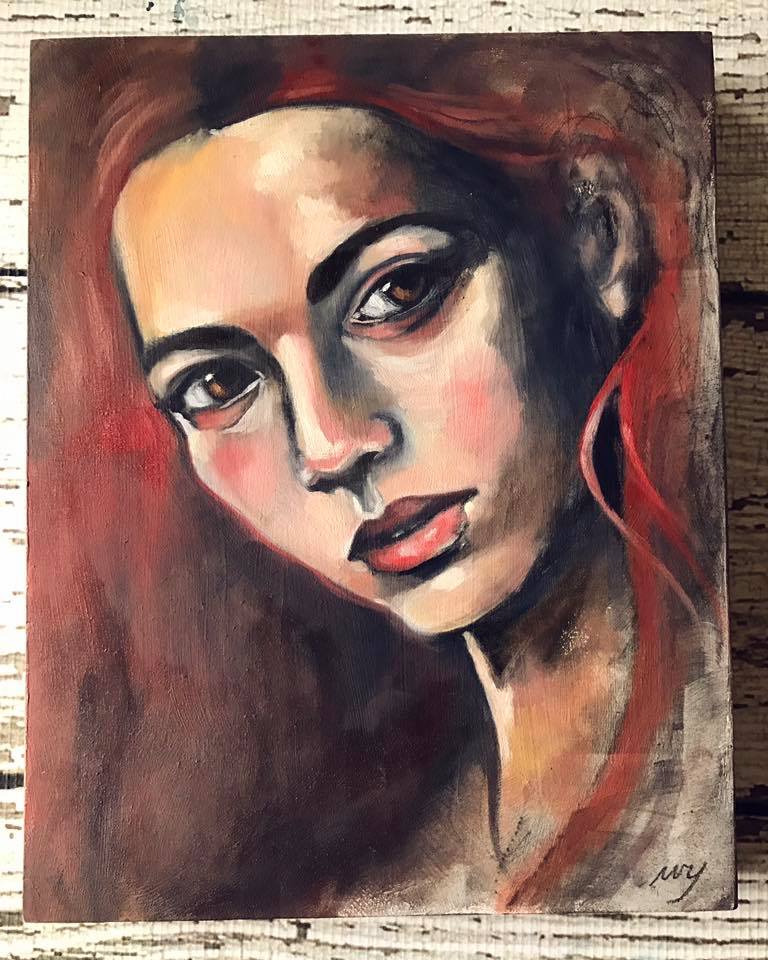
I’ve created this special, free lesson for my subscribers simply because I had so much fun creating this portrait and I wanted to share it with you!
This extensive video lesson is full of instruction and helpful tips for creating your own oil portrait! Oil paint has come a loooong way since when I used it in college. The Gamblin Oil paints I used have almost no odor and I used only walnut oil as my medium and turpenoid natural to clean my brushes. Easy peasy and safe too!
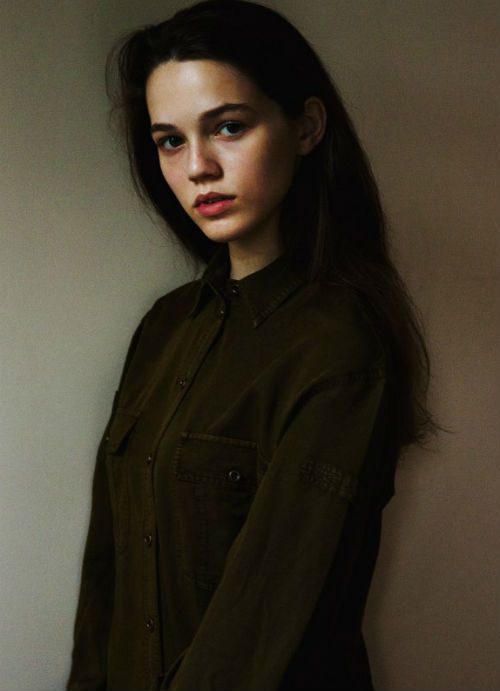
Ok, let's get started. Here is the reference picture I used to help me see the lights, darks and overall structure. If you choose another photo to work from remember to select an image with strong lighting. This helps you see form more easily. Also, I used this image as a guide only, if you want to create more likeness, then I highly recommend you use a copyright free image. I created a gallery of them right here. You can find this image on Pinterest here.
I truly hope you enjoyed that! Please let me know if you have questions and I would love to see what you create! If you aren't a member of my Facebook creative community then on over and come join us. It's the perfect place to share your art and be supported by fellow artists!
A note on varnishing...it is important to varnish your oil painting to protect it and it also gives your colors a deep saturation - a "wet paint" look. Love that! Now, usually you have to wait 6-9 months before varnishing. However, I used this new product - Gamvar Picture Varnish - that allows you to varnish as soon as the painting is dry to the touch. Did this last night with gorgeous results! Highly recommended! :)
***See full supply list below***
“I am striving. I am seeking. I am in it with all my heart. ”
SUPPLY LIST
*essential for this class
Oil Paints* (I use Gamblin Titanium White, Warm White, Cadmium Red Medium, Cadmium Yellow Medium, Raw Sienna, Payne's Gray & Blick's Portrait Pink.)
Brushes* - (I used Princeton Select Brushes - Round Blender #6, Spotter #1, 1" Flat, Catalyst Filbert #8, Angular Shader 1/4")
Walnut Oil (or oil medium of your choice)*
Turpenoid Natural (to wash brushes and thin paint)
Rag
Palette*
Canvas or wood board (I used an 8" x 10" wooden board)
Don't forget to share your ART too! Creativity is contagious! Come join in our vibrant Facebook community and connect with artists from all over the world!
